Take great travel photos and then actually do something with them!
“Photography is a way of feeling, of touching, of loving. What you have caught on film is captured forever… It remembers little things, long after you have forgotten everything.”

Have you ever wondered what to do with the hundreds (or thousands) of travel photos on your phone or camera, especially after a vacation? Welcome to photo management overwhelm - you are not alone.
Transitioning back from your travels can be daunting. You have so many stories to tell and experiences to talk about but it can be hard to answer questions like “What was your favourite place?” Or “What were some trip highlights?”
Our brains require some time to process and allow the individual experiences of a trip to blend in with your home identity. When you travel for a long period of time, I have now discovered, it complicates things further. Experiences in the first half of the trip almost seem like a completely different experience. My memory for detail is questionable at the best of times - so I rely on my travel photos to take me back to places and spaces and they help coax out the the stories.
10 weeks away and I accumulated over 4,500 travel photos and videos from the trip. Can you say overwhelming? But I knew this was inevitable, so I set myself up with a simple system for taking and organizing photos while on the road to help revisit, reflect and do something with them at back home.
Take Great Travel Photos

10 year old photographer - photo credit to my Dad
I love taking photos. I’ve been using a camera to help me connect with experiences since my first Kodak Brownie when I was 10. As an introvert - I think a camera is my favourite tool to engage with everything going on around me. When I look through a viewfinder (or a screen) I’m able to reduce all the competing stimuli and focus (literally) on a subject or scene.
Travel is not, however, ALL about the pictures. I strive for a balance between soaking in an experience by being fully present (camera down) and being snap happy. I take a lot of bad pictures… but amongst them are a few good ones and the occasional incredible one.
Start with learning how to take great travel photos
While not every photo you take will be “great” - take the time to learn some photography basics and you will be delighted to reminisce using your photos. Basic skills can help reduce the number of blurred, boring and delete-worthy pics.
As famous photographer David Alan Harvey is quoted, “Don’t shoot what it looks like. Shoot what it feels like.”
To be honest that can be hard! And when I review my pictures, I’m sometimes disappointed that the 2-D image doesn’t do the full sensory 3-D experience justice. But then, if an image captured everything, one wouldn’t have to be there, and I absolutely prefer the travel part of travel photography.

Castelo de S. Jorge, Lisbon, Portugal
Over the last few years I have read a stack of photography books and have taken several online courses. But more than anything, the thing that has improved my photography is regular practice!
There is more pressure to take a great photo when you are travelling because you aren’t likely to return soon (or ever). I have to thank the iPhone Photography School - that is where I have learned the most useful information.
iPhone Photo and Digital Editing Academy with Emil Pakarklis. I took this course several years ago and it elevated how I use my phone for photography. I first put my new skills to work in 2017 on a trip to Germany and the Netherlands and loved not carrying a camera. The course is constantly updated to reflect the emerging technology of new phones.
Digital Camera Mastery with Mark Hemmings. This was the best course for DSLR and mirrorless cameras that I’ve taken. I went from being tentative to being much more confident with camera settings. I also picked up tips on photo storage and editing too. Mark is Canadian and offers photography workshops on location in places like Italy, Spain and Japan - how wonderful would that be?!
Capture it all with Clifford Pickett - I delighted in Clifford’s warm attitude and positive philosophy about iPhone photography (and life!). The classes are set on location in Mexico, so while the skills aren’t limited to travel photo - it was perfect to get me in the mood to “work the scene” on my travels. It added some solid video making knowledge to my repertoire too.
I still have so much to learn and I do many things wrong: I forget about a setting or angle that works well in that particular setting, or I only take a horizontal photo and miss out on a wider view, or I take a video and not a picture or vice versa. While there are many lost photographic opportunities that’s ok. And I recently took advantage of the benefit of longer stay travel to return to some locations to photograph several times. Sometimes for different light, sometimes to avoid crowds, sometimes because I just wanted another chance to “work the scene.”

Plaza de España, Sevilla at sunrise…no tourist in sight!

2. Take the best travel camera for you.
Every time I go to Europe, I seem to take a different camera. I haven’t nailed my “perfect” travel photography gear yet but I quite like my current selection. I’m not a professional photographer so I have resisted investing a fortune in equipment. The camera(s) I bring really depends on the nature of the adventure.
I have the following:

Crows Nest Pass, Alberta, Canada
Small enough to slide in a pocket, drop proof on rocks, waterproof and underwater friendly. This is a great one for active adventures like long distance (or mountain) hikes, snorkeling, snowshoeing and fishing.

Dean Village, Edinburg, Scotland
I always take this one when the primary purpose is photography. I use a sling harness by BlackRapid so I can comfortably carry it all day. I brought it on our backpacking trip to Scotland and Ireland in 2019. Admittedly it got heavy and cumbersome at times but I was thrilled with many of my photos. If a car is involved it always comes with me!
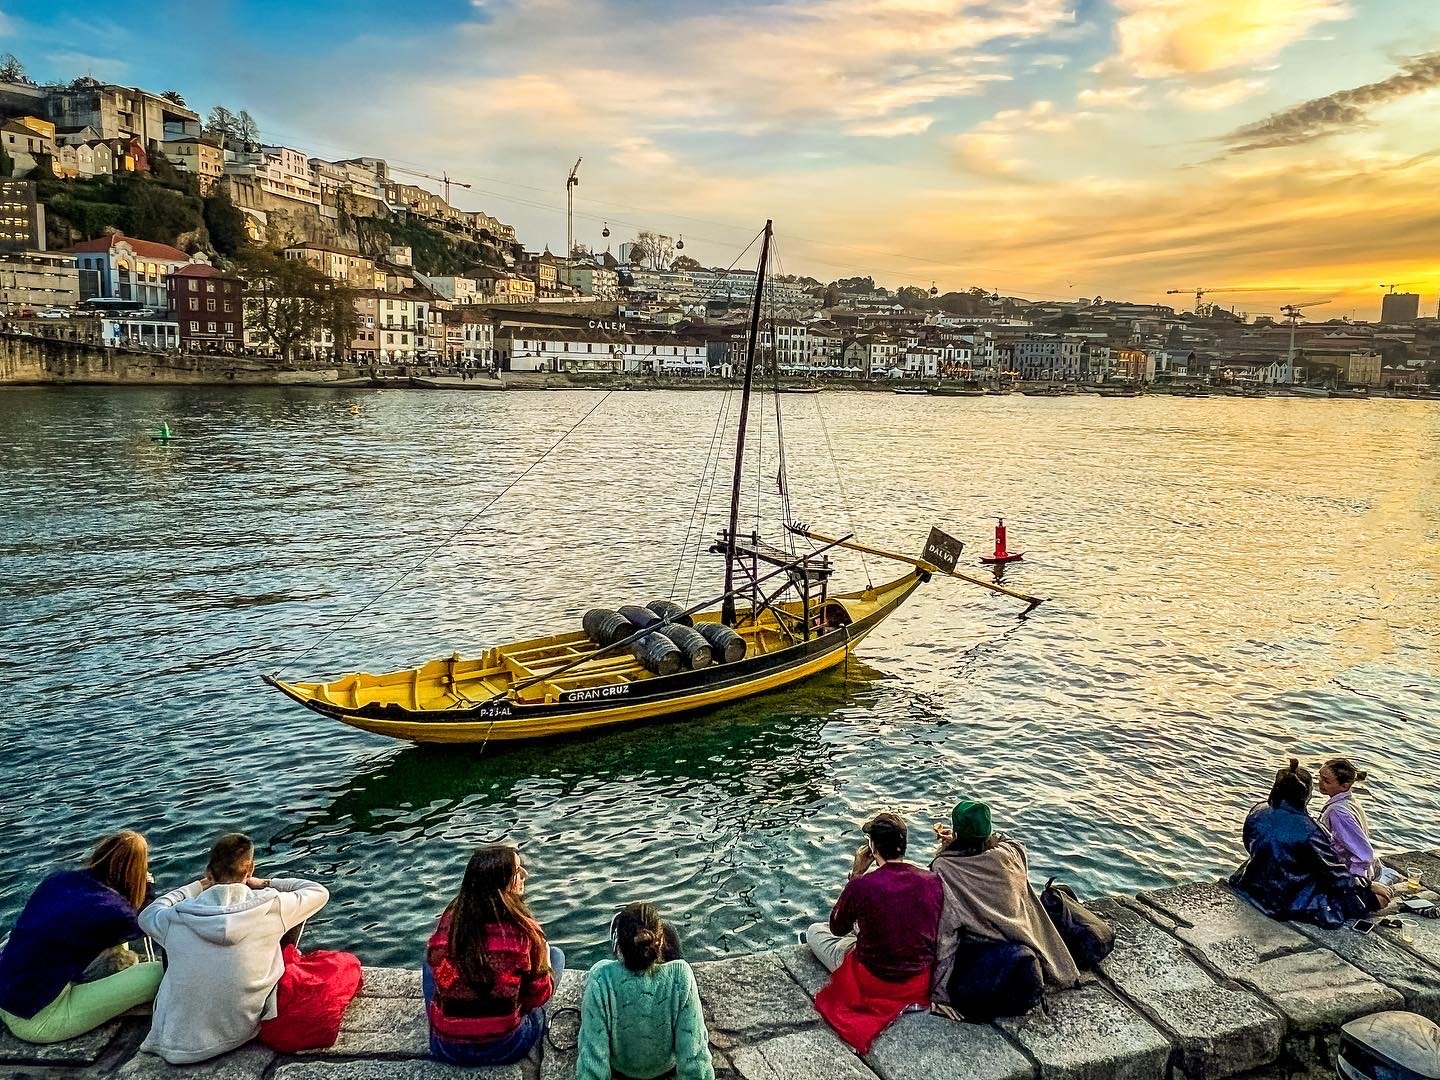
Porto, Portugal
iPhone 13 pro
In an effort to pack light with carry-on only, I left my “good” (and heavy) camera at home on my recent 10 week trip to Portugal and Spain. Do I wish I had taken my Sony mirrorless camera and a few lenses? At times yes, very much. The quality of the photos (sharpness) and creative flexibility would have been excellent. But most of the time I was very, very happy to slide my iPhone 13 pro into my slim PacSafe cross body purse. I had it with me at all times, and the 13 pro is packed with options including zoom, wide angle, night mode and raw format.
Remember that the BEST travel camera is the one you have handy!
3. Don’t limit yourself to just the “typical” travel photo
I have been to some beautiful places that have been photographed so many times that they have almost become commonplace on Instagram, Facebook, or Pinterest. I feel a bit silly taking the same picture as everyone else. But the difference between the photos I have saved on a pinterest board to the one I create myself is that I AM THERE. My picture is capturing my experience and I use MY image to transport myself into my memory.
After I’ve taken the picture that everyone else has taken (because it’s often a pretty good composition) and if I have time to “work the scene,” I engage with the place by seeing what and how I can take a photo that is a bit more unique or that speaks to my experience more directly than the instagram famous shot.

A pretty, but typical photo of the MAAT in Belem, Portugal.

Crouching down low with the usual subject blurred.

Waiting for the sun to set and noticed the glow off the building so I focused on it.

A different angle that captured the serenity of the evening beside this extraordinary building.
When I look at my travel photos, they trigger reactions about how my body felt after hiking up the hill to the vista - my lungs aching for a moment to recover while my mind is blown by the view of the outer Hebrides.
I also remember the conversation I was having with my husband as we meandered through the tangled medieval streets of Lisbon and how he became attuned to my subtle movements - as I saw a potential photo I’d move my hands toward my camera and slow my pace - without a word he would stop, step aside or grab anything I was carrying to free up my hands.
Or I can recall the smell of incense as I stood on tiptoes in the crowded street to get a shot of the gold-laden ‘paso’ as the religious procession carried it from church to convent through the winding streets of Spain.

Isle of Skye, Scotland

Sevilla, Spain

“You don’t make a photograph just with a camera. You bring to the act of photography all the pictures you have seen, the books you have read, the music you have heard, the people you have loved.”
Ansel Adams
(photo: The Alhambra, Granada, Spain)
Keep Your Travel Memories Organized
If you currently don’t have a photo filing system and have buckets of old photos, give yourself a break and worry less about organizing your old photos and more about starting a filing system going forward. The foundation for this was from the Digital Camera Mastery course with Mark Hemmings (follow him on instagram for great photo tips).
I started with a basic system of organization that works for my brain. Yours might look different but the key is being consistent! My files are named:
By year
By month
By location
I include a “Location Edited” folder to keep the original photos separate from the ones edited.
During my 10 week trip, I uploaded files daily from my phone to Dropbox (my cloud storage) in the correct filing system to keep the volume of files manageable. I then deleted the travel photos from my phone photo app as well as my phone (in storage). I wanted to avoid my phone being bogged down by big files. Doing this daily will avoid the HUGE job of organizing once home. Treat it like brushing your teeth - don’t go to bed without getting the task done!
A couple of our travel accommodations had weak wifi so it took a frustratingly long time to get this task done or I simply waited and did a couple of days together when I was in a better serviced area.
Admittedly, sometimes it was a pain being so efficient - when I needed a photo for social media or an email it was already in the cloud so I had to find it and download it as compared to it being just in my photos app. So over time I eventually got in a better rhythm to edit a few for social media, THEN upload everything.
Do Something With Your Travel Photos
Every once in a while the critical voice on my shoulder questions why I bother taking so many pictures as they will probably just stay on my computer and never get looked at. I shut her up by making time and actually creating things with my photos.
Editing is like playing with your travel memories
I love the creativity of post-processing and the opportunity to play with my photos by editing an image. I relive the experience and work with it to bring out the feeling of the moment by adjusting the light, colour, clarity ect. I tend to make my photos look like how I visually experienced them…but sometimes I make them look different than reality because it better reflects my emotions of the moment.
I shoot in raw as much as possible. That is simply a camera setting that creates HUGE files and lots of digital information allowing more editing and fine tuning afterwards. Because of that - when I look at my photos directly from my camera or phone they look a bit dull - but that dullness is potential waiting to be transformed. Digital photography using a camera or phone not capable of raw format will automatically do a lot of editing for you. If you aren’t into post processing after the fact - trust your phone camera - it is very smart!
My basic editing apps of choice
Within the iPhone camera itself is great for basic editing
Snapseed (free)
Lightroom (I pay for this but there is a free version)
2. Creative Travel Photo Projects
Here are a few ideas to get your photos out of the computer and into your life.
Chatbooks

I adore Chatbooks. If you want easy, flexible, and great quality - look no further. I’ve been creating chatbooks for years. I basically upload selected Instagram posts (photos and captions) and voila, it creates a book. Stop there…or go further (like I usually do) by adding pages, changing up photos, creating new text. If you spend time sharing photos on social media - why not quickly and easily repurpose your work into a physical keepsake!
Print Projects
I dare you to go onto Etsy, type in “gifts with photos on them” or “photo projects” and not be inspired by the hundreds of amazingly creative uses of photos. Whether you do them yourself or you send your photos to be made into something by someone else - the sky's the limit!
My new obsession is creating “art” from my travel photos. Check out my notebooks available to purchase on Amazon! I am creating a travel series and using my images for workbooks and planner covers too.
Travel Photo Walls
Printing and hanging photos are an obvious choice. I have a couple travel photo walls in my house. One is with photos on canvas and the other uses framed prints. I use and have been thrilled with MixTiles for the canvas prints (not an affiliate).
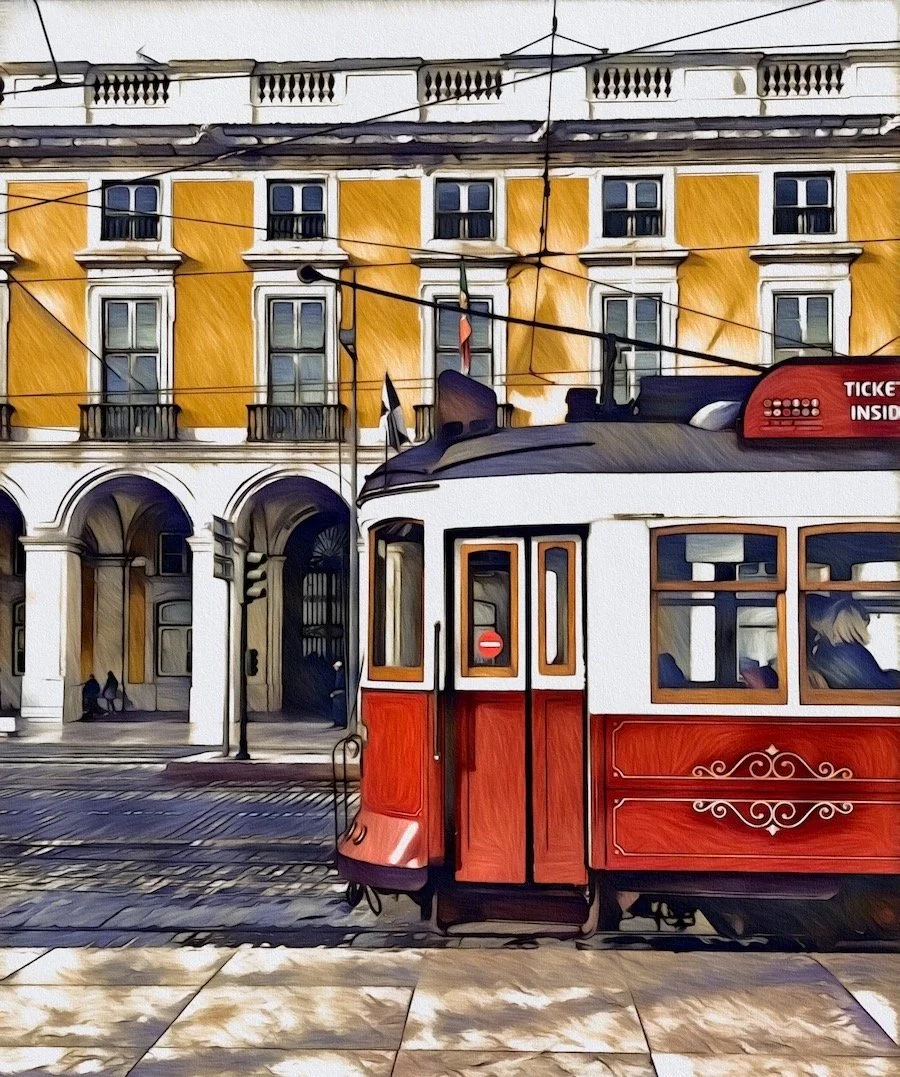
One of my Lisbon photos as a notebook cover.

Photo wall with Mixtiles

Framed photo wall
Sell Stock Photography

My bestseller - Montreal, Canada
Many years ago I set up a seller account on Shutterstock. I have intermittently uploaded photos to be sold. It can be disheartening when they are rejected but hugely validating when accepted - and cause for celebration when they sell! The process keeps me committed to improving my photography.
3. Share your travel photos!
I hope this article has, at the very least, inspired you to pull out some old photo albums or open your digital photo files for a quick peek to relive some of your past travels. You created those pictures for yourself… so carve out the time to enjoy them! I have a previous post about how reminiscing is good for you. I wrote:
Reminiscing is also good for your brain! Studies in the elderly (hey, I’m not there yet but will be!) shows it boosts memory, helps self-discovery, releases stress, strengthens bonds, and reduces boredom and loneliness. Some of these very benefits are all part of the special sauce that we seek in our travel bliss: growth, connection, novelty and even escape!
Beyond personal use, sharing your photos with others is something that research tells us fosters wellbeing related to our travel experiences. Here are a few ideas on how:
There are many ways to share your travel photos and avoid the one time DUMP into Facebook. Like a great story - spread them out over time for friends and family to vicariously travel through you.
Participate in photo challenges like #365photochallenge or #photossparkjoy on social media. #photossparkjoy is a new one for me hosted by @womensphotographycircle. I love the diversity of images, the positivity of participants, and the opportunity to share my photos.
Find a private FB photography group (they exist for beginners too). These are good places to get constructive feedback, and the feel good vibes from likes and nice comments.
Tag me in your travel photos (@travelbugtonic) on social media. I love to connect with other travel lovers through their photos and stories!
Pin this for later!